Creating a convenient DMG image for your pictures
![]() In recent years many of us have converted to Macs and still doesn't know how to use some of the gems of the platform. Creating disk images for sharing your stuff with people on the same platform is just one of them.
In recent years many of us have converted to Macs and still doesn't know how to use some of the gems of the platform. Creating disk images for sharing your stuff with people on the same platform is just one of them.
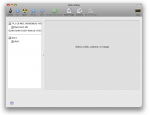
For creating an image of our beloved pics, we are going to use Disk Utility residing in Applications > Utilities folder of your Mac:
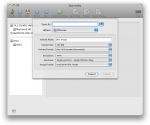
As you can tell, there's New Image icon on the toolbar. Clicking that gives us a pop-up:
From there we need to set the *.dmg filename for Save As, Volume Name as it would appear once attached amongst your disk drives and estimated size of the shared stuff for the Volume Size. That's the basic stuff you need to know. Make sure you leave Image Format to read/write.
As you hit Create, the blank image will be created, in the circumstances to Pictures folder, and mounted so that it will appear amongst the devices in Finder:

![]() Now all you have to do is to drag files onto that image. Click it to see its contents and just drag the files you needed to share into it.
Now all you have to do is to drag files onto that image. Click it to see its contents and just drag the files you needed to share into it.
And there you have it. Anyone receiving that DMG file will be able to mount it by double-clicking and can use the files on that DMG image.
One could say zipping is much faster and convenient but as soon as you come to loads of collab-related stuff you need to share, zip creates a lot of hassle with folders and isn't nearly as mobile as DMG. Keeping track of DMG revisions and modifying it is much more convenient.
Related articles:

