How to password protect DMG disk image
 There are times you need to share some sensitive data with associates or mates that you don’t want to share to anyone else or leave any possibilities for others to open and read/copy. One possibility would be to use password-protected packages like ZIP or RAR, but DMG may be slightly more convenient on a Mac.
What’s DMG?
Apple Disk Image is a disk image format commonly used by the macOS operating system. When opened, an Apple Disk Image is mounted as a volume within the Macintosh Finder1
Disk Utility
As in the previous DMG-related articles Disk Utility comes in handy when creating disk images.
You can find it under Applications > Utilities > Disk Utility.
How to create the DMG?
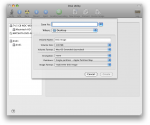
On the toolbar of Disk Utility, there’s icon for the New Image, clicking on which produces the dialogue box:
As we go through the entries, the specs for the new password protected DMG disk image are following:
-
Save As sets the file name of the image file, e.g.
My private data.dmg. - Where sets the location of the image file.
-
Volume name sets the name of the volume as it would appear in Finder later

- Volume size sets the estimated size of the DMG file. If you are going to share stuff, you probably know what would the maximum size be. For the document files you’d be safe with 10 MB.
- Volume Format is the disk format for the image that you may safely leave untouched.
- Encryption refers to the file encryption strength as we set the password. 256-bit AES encryption would make a nice choice here.
- Partitions would be fine with Single partition.
- Image Format is best to remain at read/write in order to enable later changes, e.g. if you need to add files into the image in future.
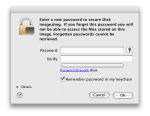
With everything filled in, hitting the Create button will create the image file at your given location and prompt you to enter password to access DMG:
Make sure to uncheck the Remember password in my keychain checkbox if you are willing to always enter password to access DMG, even on your own machine. Otherwise, if anyone opens the DMG file on the machine it was created on, they would not be prompted for the password because it would be pulled off the Keychain automatically.
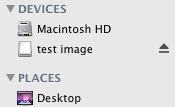
As you have created the DMG file, you can open it and drag your sensitive files to it in Finder. Once you have completed, make sure to unmount the image from the eject button by the image name ![]() .
.

